What composition is? Can we find the easiest way to involve and develop composition practically? This course is about visual transformation in photography. We will learn how create interesting, balanced, well arranged photographs, no matter what is the object.
Below, before the program begins, is the knowledge that our students gain in the Photography Fundamentals course. We expect you to know these principles, or we ask you to read the text to familiarize yourself with them before starting the Composition course. We recommend that you take the test on your knowledge of the basics of composition at this link ► What will happen on the course?
- Homework practice. You will be able to try different artistic techniques yourself.
- Homework can be done either with a camera or with a mobile phone camera.
- Let's analyze the composition of shots by classics of world photography and painting.
- We will learn the criteria for evaluating your own and someone else's photography.
- Let's learn to consciously compose an image.
- Let's start to see the structure and aesthetics of the frame.
You will talk not only about proportions and harmony. You will learn more about light and different kinds of visual funds like shapes, lines, geometry, framing, negative space, minimalism, color.
A great number of images created by contemporary and classical photographers will help you understand how it all works in practice. Analizing pictures of geniuses like Henri Cartier Bresson, Edward Weston, Andre Kertezh, moving back to Piet Mondrian and Vasiliy Kandinsky will ispire for your own experiments and experiences.
Presentations consist of the images from more than 300 well known artists!
A lot of joint analysis of students works and hometasks will help you develop knowledge very effectively.
It's vital importance for any photographer to learn about centuries of art and photography experiences. We will look at the artwork with perfectly built up reality within a frame. You will be able to understand the strongest images in all genres, arranged in accordance with the same principles and rules. It's high time to learn all of them.
ENROLL
Price group for 5 and more students: € 260
Individual lesson – € 60 for 2 hours lesson
Get know about the date of Start.
8 lessons – tuesdays and thursdays, open air practice on Saturday.
Photography course program.
Lesson 1. Introduction. Main elements of composition.
- Composition is a science. Four main tasks of composition in a frame.
- Who should I learn composition from?
- Perception patterns. 7 basic visual elements.
- Comparison of properties. Contrast. Nuance. Identity.
- Composition and frame layout. The palm rule.
- Connection. Logical and imaginary artistic connections.
- Space. Frame format: vertical, horizontal, square, 16:9.
- Angles: low, high, standard.
- The Dutch angle is a dramatic technique.
- Unusual angles from the model. Multiple exposure.
- Depth in the frame. Foreground, middle ground and background.
- Foreground subject. Staffage, ryukenfig.
- Perspective: tonal, linear, scale, textural
Lesson 2. Space. Properties of space
- Depth of overlapping shapes. Depth of shadow.
- Return to the plane. Order.
- Aesthetics of simplicity. Negative space.
- Simplification by light, by shadow. Chiaroscuro
- Simplification of framing. The technique of simplification towards abstraction.
- Geometrical and compositional center of the frame.
- Visual weight.
- Balance in the frame. Symmetry.
- Reflection symmetry.
- Five tasks for framing.
- Violation of framing rules
- Canvas reflection. Rotation.
- Checking homework.
Lesson 3. Light
- How to learn to see light?
- Light is the main element in creating mood.
- Low-key and High-key techniques.
- Five artistic tasks of light.
- Techniques for analyzing light and shadow patterns in a frame
- Seven basic characteristics of light.
- The influence of the nature of light on the perception of an image.
- Distribution of light in the frame. Creating depth using a gradient of light and shadow.
- Lighting for different objects. examples of effective lighting for portraits, products, food, architecture, etc.
- Features of natural light. Advantages and disadvantages.
- Time of day and seasonal effects on light and shadow patterns.
- Advantages and disadvantages of artificial light.
- Editing light and shadow in Photoshop and Lightroom.
- Checking homework.
Lesson 4. Frame geometry. Elements of expressiveness
- Analysis of homework.
- Naked Geometry. Impact on Perception.
- Lines lead the gaze, divide space, transmit energy, create movement and direction.
- Lines horizontal, vertical, diagonal.
- Smooth lines. S-shaped lines. The basis of plastic form
- Invisible lines. Imaginary geometric figures that organize the structure and enhance perception.
- Portrait of a composition. Where does the viewer look?
- Composition in architectural photography and landscapes
- Direction of lines and shapes: dynamics and movement of the frame.
- Grouping. Hierarchy in a frame when there are many objects (grouping).
- Forms in the frame: geometric and organic.
- Rhythm, arrhythmia. Patterns of order.
- Texture. Distance to the object, contrasts, tactile emotions.
Lesson 5. The Main Object
- Analysis of homework.
- Main object. Accent, relief, isolation.
- Hero positioning. Still, dynamic, distant/close, heavy/light, important/secondary.
- Central composition, use of the rule of thirds. Critical placement at the edge of the frame.
- Selecting the main object.
- Creating 4 contrasts between objects and background. Light, color, size, textures.
- Texture contrast. Depth of field as a selection tool.
- Framing.
- Interaction of two objects in the frame. History and plot.
- Invisible leading lines pointing to the hero.
- More than 3 objects in the frame. Grouping.
- Open and closed compositions.
- Task for practical application.
Lesson 6. Color harmony in photography.
- Analysis of homework.
- Four tasks for color: accent, emotion, style, depth.
- Iconic names: Ernst Haas, Saul Leiter, William Eggleston.
- Three physical properties of color: hue, saturation, lightness.
- Symbolism of color (4th property). "Cold and warm" colors.
- Harmonic color compositions. Circle of Johannes Itten.
- Key color in frame composition. Unity and coherence.
- Limited palette – restraint for the sake of harmony.
- One color. Monochrome, static scheme.
- Two colors. Analogous, static harmonic scheme.
- Two colors. Dynamic complementary color.
- More knowledge on the course Coloristics of Photography. 10 lessons
Lesson 7. Problems of color. Dissonance.
- Analysis of homework.
- Color dissonance. Fauvism, Expressionism.
- Adobe Color is a program for selecting harmonious color compositions.
- Excessive intensities, unnecessary areas and contrasts.
- Outdoor photoshoot. The problem of green.
- Purple mystical. The otherworldliness of purple and yellow-green.
- Variegation is the opposite of unity and emphasis.
- How to Combine Unmanaged Colors |
- A modern approach to coloristic disharmony in a frame.
- Examples of bold authorial decisions.
Lesson 7. Graduation. Compositional analysis and portfolio
- Why do we need art? Photography as ready-made.
- Analysis of works of art as a way of self-education.
- 4 techniques for critically looking at your own and other people's work.
- Literary level. The context of the frame's creation. What are the textual statements, captions, titles, descriptions, testimonies, criticism? What is the dominant theme, genre?
- Are there narratives, values, symbols, metaphors, ideas in the frame? Is the meaning of the photograph obvious or hidden?
- What works of art does the photograph rely on, who does it resemble?
- Graphic level. Main object. Are there any elements in the scene that distract attention from the object?
- Analysis of the properties of form-creating compositional elements: space, light, color, textures, lines, shapes.
- Technical level: aperture, shutter speed, focus, exposure, shooting time, angle, lens. Do they help to develop the theme?
- Does what you see and feel help support the content of the frame?
- Course summary. Students' conclusions on course projects.
10 best publications on the topic of composition in photography that we recommend reading.
- John Berger. The Art of Seeing
- Johannes Itten. The Art of Color. ArtHuss
- Johannes Itten. Elements of Fine Art. ArtHuss
- Henry Carol. How to Take Incredible Photos | ArtHuss
- Henry Carol. How to Shoot Incredible Landscapes | ArtHuss
- Henry Carol. How to Take Incredible Portraits ArtHuss
- Mythology composition in photography. Andrey Zeigarnik .
- How people see. Dmitry Chernyshev .
- The Tao of Digital Photography by Michael Freeman .
- Vasily Kandinsky. Point and line on the plane. On the spiritual in art.
TOP 10 techniques of composition in photography are most often used to obtain an expressive and aesthetic shot:
How do you check your layout or composition? All forms are connected. If we remove any, we affect the content. The main task of composition is to capture the attention of the audience." (Arnheim Rudolf)
- Balance through visual weight and symmetry.
- Leading lines direct the viewer's eye to the main thing in the image.
- Framing an object to draw attention to it.
- Depth of field, perspectives as imitators of reality.
- Angle or choice of a unique point to create an intense composition.
- Simplify the frame by removing distracting elements. Focus the audience's "optics".
- Color is a tool for setting mood in a plot, emotion, and emphasis.
- Contrasts: Five types to create a more dynamic and exciting image.
- Framing is the process of creating a frame scene and removing all unnecessary elements.
- Negative space is for simplification, for creating a sense of balance, for drawing attention to the hero.
Art photography has its own visual language and if you know at least a few important techniques, you can already create your own strong photograph. It is this photograph that will start a new author's project. Which, in turn, will become the basis of your own style!
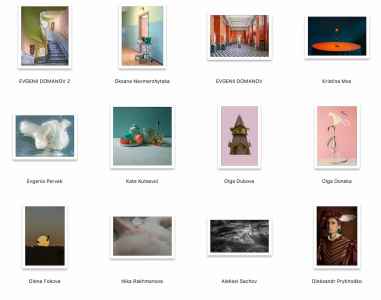
Here, as an example, is the history of victories of fifteen graduates of the Composition course. Our graduates took prizes in the international competition ND AWARDs. Another 5 received Honorable Mention from the jury of the photo competition. Congratulations on the victory: Olga Donskaya, Olga Kondratieva, Svetlana Zaritsky, Oksana Demyanets, Nikolay Lebedev, Kate Kutsevol, Maria Kurnysh, Liza Karlikova, Olga Dubovaya, Aleksenets Prikhodko, Olga Morozova, Evgeniya Pervak, Kristina Mos, Evgeni Nevmerzhitskaya, Elena Fokova, Aleksey Sakhov, Svetlana Moiseenko, Nika Rakhmanova. Below are photos of the graduates-winners of ND AWARDS 2021
Error


Foundations of Composition in Photography
The biggest challenge in photography is that when we press the shutter button, the warm, fragrant, gentle, enchanting reality transforms into a flat plane of spots. Yet, we want our viewers — who are sober, not insane, and adult, so they're hard to deceive — to look at these spots on a flat surface and believe it’s reality. We want them to laugh, cry, and even want to pay money for another session. If that happens, it means your composition was convincing.
My personal definition of composition is a set of set of guidelines, principles, or tools for communicating with the viewer on a flat plane, for constructing an order and clear visual statment. Reality becomes flat, but we still want to influence our viewers. When I say "our viewers," I also mean us, because we are the first viewers of our own photographs.
Review of Homework.
Before we dive deeper into composition, let's look at your homework. This homework focused on the features of using wide-angle and portrait lenses.
Common Beginner Mistakes & Lens Distortion.
Often, beginners, unlike our students from course II "Experienced Photographer", make six basic and typical amateur mistakes. One of them is not using the appropriate lens for the genre.
When looking at your photos, it's sometimes hard to see the difference between wide-angle and portrait lenses, especially if you don't get close enough to your subject. To truly see the distortion of a wide-angle lens, you need to get as close as the lens allows.
Think about your mobile phone camera. If you photograph yourself from above, you get a big head and small hands. If from below, you get big hands and a small head. This is distortion. While mobile phone lenses have a very small focal length e.g., 5mm., you don't see powerful distortions often because the software in your phone corrects these perspective distortions programmatically.
Focal Length and Aperture Effects.
- Focal length strongly changes the appearance of a photograph.
- Aperture also significantly impacts the image. A wide aperture e.g., f/1.2. creates an artistic blur behind the model, which doesn't distract from the subject. However, if the location is interesting, it’s beneficial to close the aperture use a higher f-number. so that the beautiful location also contributes to the picture.
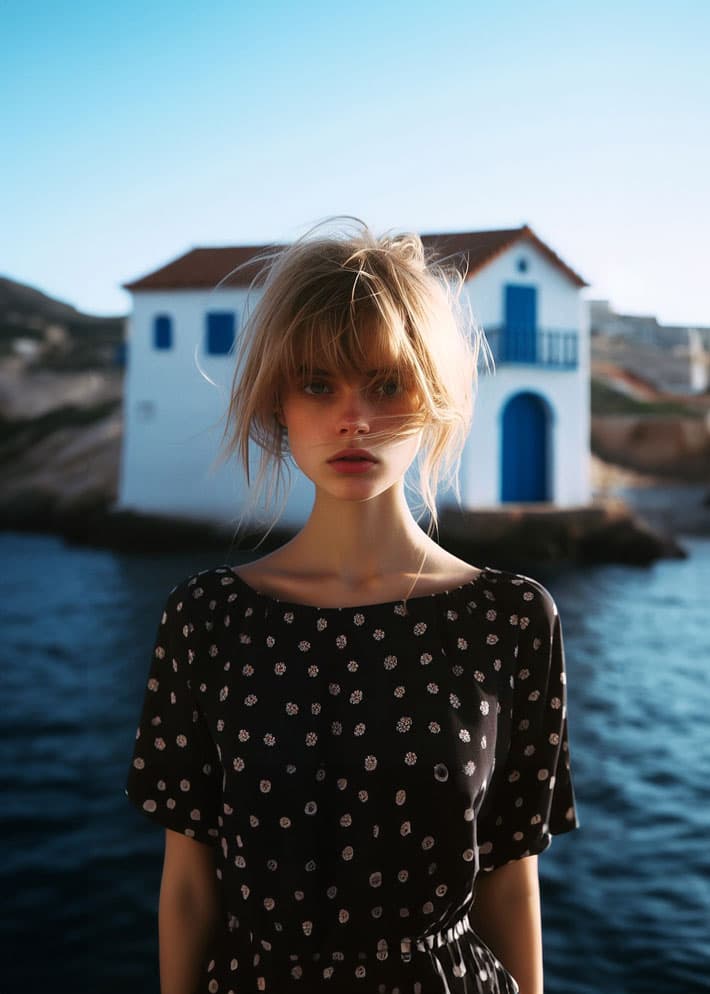
Importance of Location. The "Dress" Analogy.
Another common mistake is not paying attention to the location behind the subject. I draw a parallel between the location and a dress. If our model is a girl, the location can be her dress. Even for a quick, technical homework assignment where you photograph the same subject with different lenses, consider if it's the most ideal location.
For example, a "garbage sky" or a pipe sticking out are elements that detract from the image. Finding a good location is a separate conversation, but it will become clearer after today's lesson.
Six Ways to Correct Compositional Errors - Especially Backgrounds.
I’m glad you made mistakes in your homework because now the whole group can learn six ways to get rid of them. Don't hide your mistakes; show them. My photographic father, Jock Sturges, an American photographer, used to say: "A photographer's mistakes are golden plates on the path to mastery".
Here are six techniques to improve your composition, especially concerning problematic backgrounds:
- Change the angle. Adjust your position e.g., from left to right. so that background elements like "horns" growing from the model's head. disappear.
- Take the person by the hand and lead them to a different location: Sometimes, the simplest solution is to move your subject.
- Open the aperture wide. A wide aperture creates a strong background blur bokeh., making distracting elements disappear into a pleasant blur. For example, a Sigma 56mm f/1.4 lens is excellent for this and more affordable than native brand lenses.
- Remove elements with hands. If there's something bad behind the model, you can try to remove it. This is often a joke, as it's not always practical..
- Tight cropping. Get close to your subject so that the model fills the frame, and distracting elements are simply cut out by the edges of the photo.
- Post-processing. Use editing software. Use tools like Google Photos which offers non-destructive editing. to crop out unwanted elements or apply filters to improve aesthetics.
Lens Properties and Their Creative Use.
Remember that every lens has its advantages and disadvantages.
- Wide-angle lenses give you a wide field of view, allowing you to include a lot of the surrounding environment. This can be used to benefit your model, by showing the charisma of the surroundings.
- However, wide-angle lenses can also lead to distortion of ideal human proportions. According to Leonardo da Vinci’s Vitruvian Man, healthy humans are mathematically proportional e.g., head fits 7 times into body length, navel is the center. Distorting these proportions can make a person look "disproportionate" and evoke sadness or pity in the viewer.
- General rule: Be aware of advantages and disadvantages of wide-angle lenses for photographing people. Take care if you want natural proportions, as they can make legs look big and heads small. This is why you might not get paid for such a photo, or even receive a reprimand from your model.
- BUT, rules can be broken creatively!. There are many situations where a wide-angle lens creates an unusual and interesting picture. This is our first compositional rule today: In photography, there are many rules, but we will break them creatively. This means there are no rules, only principles. Principles often help, but if you want something unusual, you break them.
- Creative distortion: Fashion photography, for instance, often uses wide-angle lenses "not for their intended purpose" to create striking, distorted images, as seen in works by Nadine Ijewere, Miles Aldridge, Platon, or Nick Knight. This aligns with the compositional phrase: "Be different or die!".
- Environmental Portraits: Arnold Newman advocated for wide-angle lenses for portraits because they allow you to include the subject's environment e.g., musical instruments for a composer., which characterizes him rather as an artist then a mundain man.
- Close-up but distant: If the model is in the center and you step back a bit, even a powerful wide-angle lens like 18mm. might not cause significant facial distortion. The main distortion from wide-angle lenses occurs at the edges of the frame.
- Telephoto lenses Long-focus lenses.: If you want to bring the background closer to the model, use long-focus lenses e.g., 135mm, 150mm, 200mm. Bens Mate, for example, used a 200 mm lens to create a dramatic scene where a snake and hummingbird appear to be fighting, even though they were far apart and didn't see each other. This creates flattened depth of field, making both foreground and background sharp.
Composition as Conscious Ordering.
Composition is about the predictable ordering of reality within the frame. Reality itself isn't necessarily beautiful or ugly; beauty appears in the eyes of the beholder, usually the photographer.
We are all composers in our daily lives – from choosing clothes to decorating our homes.
The Seven Notes of Composition.
Just like there are seven colors, seven notes, and seven wonders, there are seven "notes" of composition that influence the viewer:
- Space
- Lines
- Figures
- Forms
- Textures
- Light and Shadow
- Colors
The Billiards Metaphor: Choosing the Right Technique.
Compositional rules do not work constantly. Like in billiards, you can't always hit the white ball at a 45-degree angle to win; different situations require different approaches. With 300 compositional techniques we'll cover 25-30 today., you need to consciously or intuitively choose the right palette of techniques for each situation.
The Theater Metaphor: The Frame as a Stage.
I compare a photo frame to a theatrical stage. All compositional techniques aim to create aesthetics, beauty, or harmony, and convey emotions or a story on the flat plane of the frame, just like on a theatrical stage.
Working with Space: Formats and Subject Placement.
The space within a frame has different properties. Formats:
- Vertical format is typically used for people.
- Horizontal format is usually for inanimate objects: nature, still life, architecture. However, this is conditional, and horizontal portraits can be great.
- 16x9 Panoramic format.: This is the format of our phones and TVs. It's very dynamic because it forces the viewer's eyes to move across the image, creating a sense of virtual movement. Dynamic photos make the eye "run" across the image, while static ones keep it fixed.
- Square format 1:1.: The Renaissance masters Donatello, Michelangelo, Leonardo, Raphael. considered the square a "divine shape". Neuroaesthetics research shows that a simple square can trigger endorphin release in the brain.
- Using the square: Here is a joke: if your mood is blue, your model is far for perfection and the location is terrible, you can crop to a square and convert to black and white. This will enhance the image's aesthetics. Instagram started with square formats for the reason – it makes anything look better.
- Historical context: In the 1970s, companies like Hasselblad and Rolleiflex sold medium-format cameras 6x6 cm film. specifically for their square format, used by renowned photographers like Francesca Woodman and Michael Kenna. And lot of others – Diane Arbus, Richard Avedon, Irving Penn, Helmut Newton, Robert Mapplethorpe, Hiroshi Sugimoto, F.C. Gundlach, David Bailey.
- Conscious decision: Mature photographers make compositional decisions consciously, not just intuitively. They think about how to enhance aesthetics, often combining multiple techniques.
Placement of the Subject:
- Center Composition: As predators, humans are naturally drawn to focusing on a target. Most beginners place their subject in the center. The center also offers the best focus and least distortion.
- Rule of Thirds: If you divide the frame into three equal vertical and three equal horizontal parts, the intersections create "points of tension" or "visually active points".
Dynamism: Placing the subject in the thirds often creates a more dynamic image, even if the subject is static. It leaves space for their thoughts, dreams, or incoming elements.
Balance: The rule of thirds is the simplest way to balance an unbalanced composition. Even if the main visual weight is on one side, the "tension points" anchor the image, making it feel balanced. - Genre-specific application: For human subjects, eyes are often placed on the upper active line or the head in the points of tension. For landscapes, two-thirds of the frame might be dedicated to the main subject e.g., rocks., with the horizon on the lower or upper active line. However, this can also be broken, as seen in Michael Kenna's work where the horizon is often centered for a calm, stable feel.
- Periphery of the frame: Pay attention to the edges of your frame. Even small, distracting elements can draw attention away from the main subject. As humans, we constantly scan the periphery for threats or interest.
Simplifying the Scene: Minimalism in Photography.
Modern photography, unlike the detailed works of the past like Karl Bryullov's "The Last Day of Pompeii"., often leans towards simplification or minimalism. This is because we are now saturated with visual stimuli.
Here are six ways to simplify your photographic canvas:
-
Add free space around your subject Negative Space.: This is also called empty space, negative space, air around the object, free field, viewer's field, or isolation. The Japanese concept of "MA" 間., meaning "the great nothingness in which unimportant everything happens," perfectly encapsulates this idea. Ancient Chinese and Japanese art masters understood the power of emptiness. Laozi famously said: "We value a building not for its walls, but for the emptiness inside; we value a jug not for its walls, but for the emptiness inside; we value a wheel not for its spokes, but for the emptiness between the spokes.". Understanding this principle helps you find aesthetics in mundane places, like your home. It focuses your "optic of perception" on free space. Example: Christ in the thirds, surrounded by a large circular emptiness a circle is an aesthetically pleasing geometric figure. Photographers like Dmytro Bahachuk seek empty spaces like large lakes or oceans, or shoot at dawn to avoid visual clutter and embrace the minimalist aesthetic. Alex Webb also uses isolation to great effect.
-
Background blur Bokeh.: This makes it easier for the eye to understand what it's looking at, as the background is pleasantly blurred. Panning blur blurring motion. is also a very interesting artistic technique because we don't usually see things this way in real life.
-
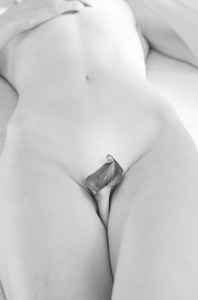
Monochrome Black & White.: Removing color can elevate aesthetics because the brain processes color in 16 different centers, consuming a lot of energy. When color is removed, the brain is "relieved," making the image simpler and more powerful. When not to use B&W: If your photo relies on color aesthetics e.g., flowers, butterflies, sunsets, colorful food., B&W might not improve it. Cyanotype as an example of monochrome that isn't black and white, producing a unique blue tone.
-
Fog/Mist/Smoke: Fog and mist hide unnecessary visual richness and complexity. They create a sense of mystery and rarity, making the image more appealing. Smoke machines can replicate this effect in a studio.
-
Chiaroscuro.: Invented by Caravaggio in the Renaissance, chiaroscuro (light and dark) means illuminating the main subject powerfully while hiding everything else in shadow. This simplifies the visual information and directs the viewer's eye to the brightest, most important part of the scene. Alex Webb effectively uses shadows to conceal visual clutter.
Technical note: To achieve this, use spot metering on the brightest part of the scene. A closed aperture f/8 or f/11. keeps the subject sharp while the rest falls into shadow. -
Simplification to Abstraction Critical Cropping & Unique Angles. Flat Lay: Photographing critically from above. This is common in food and product photography to make ordinary objects look extraordinary. "Shoot like a bird, shoot like an ant". People don't normally see the world from these extreme angles, making the photos unusual and captivating. Shooting from below: Like Elliot Erwitt, who photographed dogs from their level, creates an intimate and unusual perspective. Critical Cropping: Instead of the whole building, photograph only specific bricks or lines. This creates an abstract image based on shapes, colors, and diagonals, which can be highly effective and win awards. Studio background: Using a plain studio background is a straightforward way to isolate the model from their environment. Richard Avedon, for example, traveled with a large white background to photograph ordinary Americans, isolating them to highlight their individuality.
Creating Depth: Perspective as a Compositional Tool.
Viewers expect realism and depth in photos, as if they are looking through a window into reality.
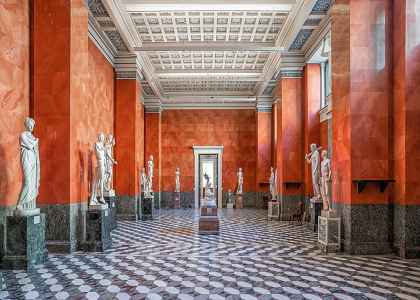
- Linear Perspective: This compositional technique, invented by Filippo Brunelleschi in the late 14th century, makes all lines in the frame converge towards a single vanishing point on the horizon line. This is also known as "man-made perspective".
- Tonal Perspective: This involves differentiating foreground and background based on qualities like:
- Warm/Cold
- Clear/Blurred
- Contrast/Non-contrast
- Dense texture/No texture
- Saturated/Desaturated
- Example: Peter Bruegel the Elder's "The Fall of Icarus" shows foreground elements peasants. as warm, clear, and contrasted, while the distant background and Icarus are cold, blurred, and desaturated.
- Scale Perspective: Making objects appear larger or smaller than they are in reality. Ai Weiwei's photo project "Study of Perspective" famously shows his middle finger appearing larger than famous landmarks or buildings of power. This highlights the idea that power structures are not serving the people.
Highlighting the Subject: Figure-to-Ground Ratio.
It's crucial that the viewer immediately understands who the hero of the photograph is. The main subject must stand out from the background.
Here's how to differentiate your subject:
-
Get Close Proximity.: The simplest solution is to approach your subject closely. This creates a tight crop where the subject dominates the frame, making their identity clear. Cindy Sherman's work, though often controversial in framing, uses extreme close-ups to isolate her subjects. Jock Sturges sometimes used tight cropping to avoid showing distracting elements in the background.
-
The Three Divine Contrasts: If you only remember one thing from this lesson, remember these three contrasts. When all three are present, a photo looks professional, not amateurish.
- Tonal Contrast Light/Dark.: Photograph light subjects on a dark background, or dark subjects on a light background.
- Color Contrast Warm/Cold, Complementary Colors.: Photograph warm colors on a cold background, or vice versa. Photographers often guide models to wear warm-colored clothes to contrast with a cool background.
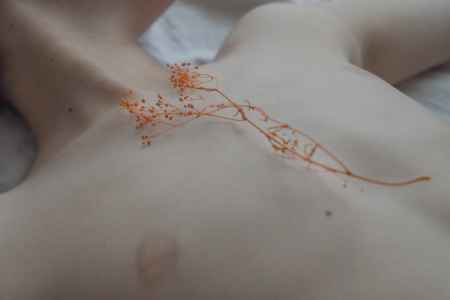
- Textural Contrast Sharp/Blurred, Smooth/Rough.: Photograph a sharp subject against a blurred background bokeh., or a smooth subject against a rough background. Newborn photography often uses rough textures to highlight the baby's smooth skin.
- These three contrasts are often combined intentionally in professional work.
-
Framing Framing/Reflections.: This is a simple and reliable way to highlight the main subject.
- Mirrors/Reflections: Photographing yourself or others in mirrors is a must-have for photographers, as it's a common and visually rich technique used by many masters like Helmut Newton and Alex Webb. Reflections in surfaces like tables can also create interesting, abstract images.
- Natural/Architectural Frames: Look for frames created by windows, doors, arches, or even pergolas arches made of plants..
- Human Hands: Using hands to frame or partially obscure the subject is also a compositional technique, creating intriguing portraits.
Course Summary & Homework Assignment.
Today, we've had many discoveries and I've tried to share a lot of interesting and effective material.
Here are five key takeaways for your photographic practice:
- Pay attention to the background, then the subject: This is a muscle reflex you need to train. Challenge yourself this week: whenever someone enters a room, look behind them first, then at them. Train this "photographer's gaze".
- Separate the subject from the background: Use the three divine contrasts tonal, color, textural..
- Give the subject "air" and balance: Utilize negative space and the rule of thirds.
- Use perspective to simulate depth. These techniques are not just for the pros; they are what distinguishes more experienced photographers from beginners.
Your Homework for next time: Please create two photos.
- First photo: Focus on a hero person. placed in the thirds. Ideally, incorporate the three divine contrasts:
- Light hero on a dark background or vice versa..
- Warm hero on a cold background or vice versa..
- Sharp hero on a blurred or plain background textural contrast.
- Second photo: It can also be a portrait, but focus on the background using linear perspective. Linear perspective is easy to find in a city: look for long avenues, bridges, or buildings that create converging lines.
Resources and Further Learning.
- I lead a monthly composition course with 8 lessons, each lasting three hours, where we delve much deeper into these concepts.
- Follow the Kyiv School of Photography's Telegram channel. I manage it, and I share surprising insights and interesting books on composition and color theory in Ukrainian, English, and Russian..
- On the Kyiv School of Photography website, in the "Photoclub Articles" section, you'll find my translations of important photographic texts, including Cindy Sherman's "Untitled Film Stills". This article explains why her seemingly "unremarkable" photos were acquired for millions of dollars by MoMA.
After Q&A.
Instructor: Thank you for your attention. I hope you found this lesson as interesting as I did. Your homework was excellent! I will upload the recording of this lesson in about an hour. I recommend rewatching it, as you'll likely discover new ideas that you might have missed initially. You can also find me on Facebook. The school offers post-course support, so if you have any questions, I'm here to help. Good evening, everyone!
Students: Thank you! Good evening!